If you haven't already, read Key concepts first. This guide assumes you know what an animal record, a label, an event, a workday, and a report are.
App anatomy
The main menu
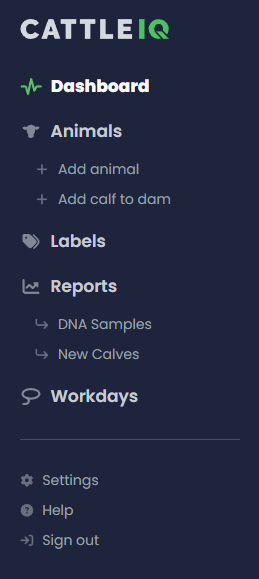
Down the left side of the app:
- Dashboard: recent activity on your account, plus quick links to documentation and guides like this one.
- Animals: the main built-in report of your active herd. Two shortcuts sit underneath for adding a new animal record from scratch and for adding a calf based on its dam.
- Labels: where you create and manage your labels.
- Reports: where you build and configure reports, both built-in and custom. Any report you mark as a favorite pins below this menu item for quick access.
- Workdays: where you manage your workdays.
- Settings: your personal profile, ranch-wide account, and subscription.
- Help: submit a support ticket if you're running into trouble.
The navbar

At the top of the screen:
- Search (top left): a quick lookup for any animal record. Type to find it and jump straight there.
- Notifications (top right): a bell icon. Click it to see notifications about your account.
- Page actions: many pages add their own page-specific buttons here. On an animal record, for example, you'll see a shortcut to Add detail and one to Edit animal.
Setup checklist
Four things you might want to do up front to get more out of the app:
- Read Key concepts for the basic vocabulary you'll see throughout the app and documentation.
- Invite your team if you're the account owner and you've got people who'll be working in the app with you. See the Subscription section below.
- Configure your identifier types. Tag, Bangs, DNA Sample, whatever your operation uses. They have to exist before you can use them on records. See the Identifier Types section below.
- Create some labels. To add labels to animals, you'll need create them first. See the Label setup section below.
Configuring settings
On the Settings page, you can manage your subscription, configure ranch-wide options, and more. There are a few things to look over initially.
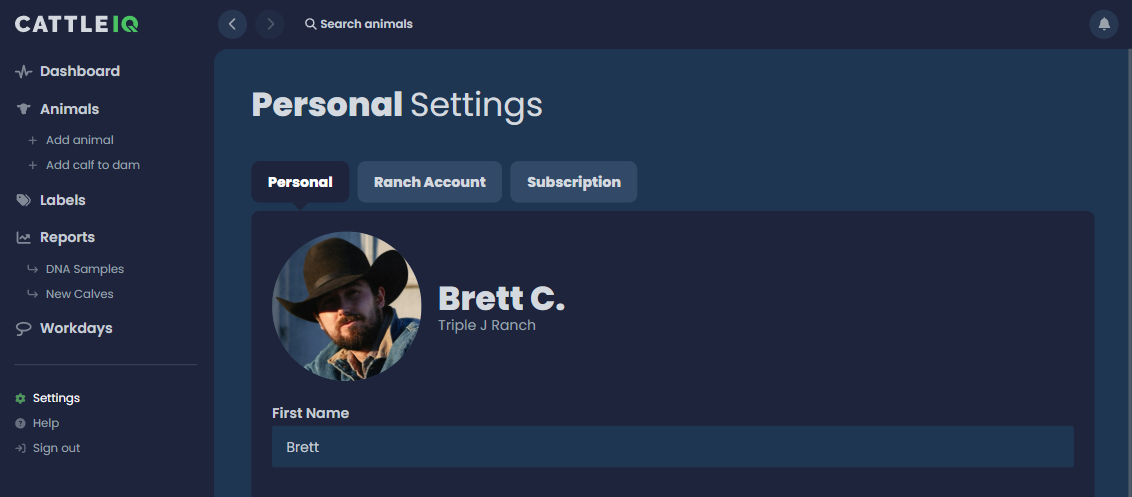
Subscription
The Subscription settings tab shows your current subscription information: plan, seat count, renewal date.
If you're the account owner, this is also where you manage the subscription itself and your team. You can invite additional users from here. Each invited user gets an email; once they accept, they take a seat on your subscription.
Ranch account
The Ranch Account settings tab is where you can configure options for how you want your operation to run. These settings take effect for all users on your account, and they're split into several categories. We'll just cover Identifier Types to get started.
Identifier types
You'll need to use the Identifier Types ranch settings tab (Settings > Ranch Account > Identifier Types) to set the identifier types your operation uses: Tag, Calf Tag, Bangs, Tattoo, DNA Sample, and so on. You can add more anytime, but until a type exists in this list, you can't pick it when entering animal records.
Label setup
Before you can put labels on animal records, you need to create them on the Labels page. A few worth setting up before you start adding records: pasture labels, Cull, Sell, ownership or brand labels, anything else that lines up with how you already think about your herd.
One label is built in: Sire. Apply it to any male animal you want to appear in the sire dropdown when entering lineage on a calf or breeding event.
See the Using labels guide for in-depth details on how to use these.
You're ready!
Go enter your first animal and see it appear in the Animals report.
When you're ready to go further, more advanced guides cover topics like importing data from spreadsheets, streamlining calving, and working with genetics.